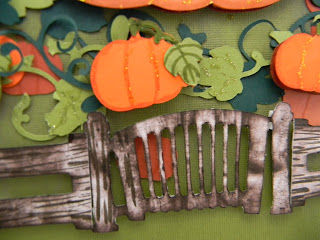
I was so excited when I received the Freshly Picked cartridge for my ScrapbookPal.com Design Team and immediately thought of gardens and spring time and all the cute things I could make with the cartridge. But when I started my LO, I wanted to do something different with the cartridge. I mean who looks at the Freshly Picked cartridge and thinks "Halloween"? I guess I do!
Recipe:
Freshly Picked Cricut Cartridge
Cindy Loo Cricut Cartridge (or any cartridge with scrolls/flourishes)
Songbird Cricut Cartridge (or any font cartridge)
Plantin Schoolbook Cricut Cartridge (or any cartridge with tags)
1 sheet each of 8.5 x 11 orange cardstock in 3 shades
1 sheet each of 8.5 x 11 green cardstock in 3 shades
1 sheet 8.5 x 11 yellow cardstock
1 sheet 8.5 x 11 white or brown cardstock
1 sheet 12 x 12 dark purple cardstock
1 sheet 12 x 12 green cardstock
1 sheet 12 x 12 black cardstock
Stickles in Purple, Lime Green, Orange Peel
Brown ink pad (if using white cardstock for fence)
Markers in Brown, terracotta, medium orange, and a medium green (I used Stampin' Up markers: Early Expresso, Cajun Craze, Tangerine Tango, Old Olive
PopUp Glue Dots
Tombow Liquid Mono Adhesive
Tombow Mono Adhesive Runner
Instructions:
Cut purple cardstock to 5.5 x 11.5.
Cut one end of green cardstock in a wavy pattern to form "rolling hills". Then cut green cardstock to 7.5 tall by 11.5 long.
Cut 6.5" circle from yellow cardstock.
Using Freshly Picked Cartridge, cut pumpkins in variety of sizes on all 3 colors of orange cardstock. Cut out 1 - 3.5" pumpkin on 2 shades of orange. Layer these 2 cuts using pop up glue dots. This will become your center pumpkin on the layout.
In total, I cut approx 60 pumpkins in sizes of .75", 1" and 1.5". Layer some of the pumpkins using pop up glue dots. For the tags, I created 2 layered pumpkins by layering 2 of the 1.5" pumpkins in 2 shades each with pop up glue dots. Set these 2 pumpkins aside.
Cut the leaf layers in .75", 1" and 1.5" and then adhere to pumpkins with Tombow Mono Adhesive. Cut out extra leaves for layering on the vines.
Using the Cindy Loo cartridge, cut scrolls/flourishes on the 3 shades of green cardstock. These will become vines.
Add dimension to your pumpkins and leaves with markers and stickles.
Using Tombow Mono Adhesive Liquid or Runner, adhere the large layered pumpkin in the approximate center of the green cardstock. Then adhere some of the pumpkins and and vines and leaves to the green cardstock in a random pattern. You don't have to glue down all of the vine edges because it just gives more dimension to the page when they stick up. When you have a nice base layer of pumpkins and vines, adhere the layered pumpkins on top along with more vines and leaves.
Using Freshly Picked cartridge, cut out the fence at approx. 1.25" and the gate at approx 1.5" on white or brown cardstock. I cut mine on white and then used dark brown ink and markers to give the fence a woodgrain look.
Add pop dots to the fence and gate and place them on the bottom portion of the green cardstock.
Using Design Studio and the Songbird cartridge, I cut "The Great" at 1" on leftover purple cardstock, "Caper" at 1" on green cardstock, and "Pumpkin" at 2" on the bright orange cardstock and welded the words together before cutting.
Use purple stickles on "The Great", lime green stickles on "Caper", and orange peel stickles on Pumpkin. Let dry!!
Adhere the 5.5" tall purple cardstock to the black 12" x 12" cardstock with Tombow Mono adhesive tape runner allowing for 1/4" margin on top and sides.
Adhere the yellow circle on top of the purple cardstock. I wanted only 3/4 of the moon showing so the rest will be hidden behind the green cardstock.
Adhere the green 7.5" tall cardstock to the black 12" x 12" cardstock, allowing 1/4" margin on sides and bottom, with your adhesive tape runner, only using the runner on the sides and bottom of the green cardstock. Do not apply adhesive at the top or center of the green cardstock or else your tags won't be able to slip behind it.
Using Plantin Schoolbook, cut 2 tags at approximately 2.5" wide by 4.5" long on purple cardstock. Glue the 2 layered pumpkins you set aside to the top of the tags. Slip the tags behind the green cardstock. By using layered pumpkins, you don't have to worry about the tags sliding down behind the green cardstock.
Adhere the words "The Great Pumpkin Caper" on to the moon.
After I took photos, I decided to add a mat to the tags so I placed a yellow rectangle of cardstock on each tag.


